
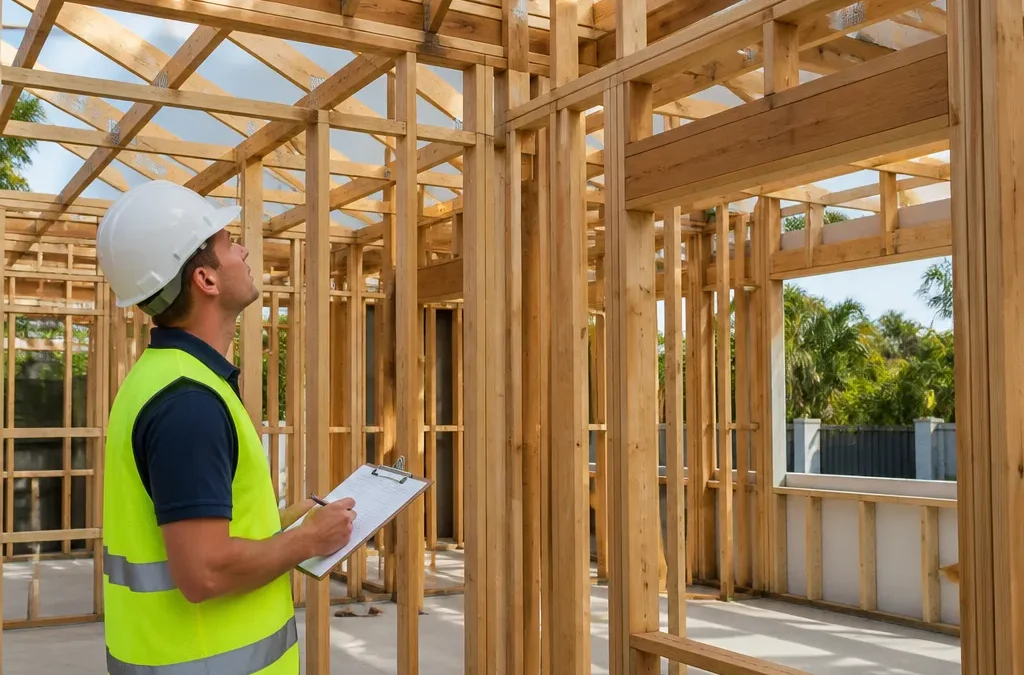
Timber framing defects in a new home in Queensland are rarely visible at handover. The walls are painted, the floors are polished, and the kitchen looks finished, so most buyers walk through and sign off. The timber frame that carries the roof and transfers loads into the slab or stumps sits behind plasterboard, and that is where the expensive problems hide. By the time a crack appears above a doorway or a wall starts to bow, the evidence has already been covered. This guide explains what inspectors check in the frame of a new house across Brisbane, the Gold Coast, Logan, Ipswich and Redland Bay, and how you can check the most important points yourself before you accept the keys.
Table of Contents
- Quick Takeaways
- Why Timber Framing Defects Are Missed at Handover
- Bottom-Plate Tie-Downs and Wall Plate Fixings
- Stud Grade, Spacing and Stud-to-Plate Connections
- Roof Framing: Rafters, Ridge Beams and Purlins
- Floor Framing and Subfloor Bearers
- Comparing Framing Inspection Approaches
- Assigning Responsibility for Framing Defects
- Frequently Asked Questions
- References
Quick Takeaways
| Key Insight | Explanation |
|---|---|
| Check bottom-plate tie-downs before lockup | The rods and hold-down brackets resist wind uplift. Once plasterboard covers them, they cannot be checked without cutting into the wall. |
| Match stud grade and spacing to the approved plans | Inspectors compare grade stamps and stud centres against the frame drawings, not against what looks straight by eye. |
| Photograph stud-to-plate connectors at frame stage | Missing or misplaced connectors are easy to photograph while the frame is open and nearly impossible to prove afterwards. |
| Treat sagging ridges and ceiling cracks as framing questions | A dipping roof line or cracking at wall and ceiling junctions can point to undersized or poorly fixed rafters. |
| Confirm ridge detail against the drawings | A structural ridge beam and a non-structural ridge board carry load differently. A substitution changes how the whole roof behaves. |
| Ask for framing photos before the frame is covered | A dated photo set from the frame stage is the only reliable record of what was installed behind the lining. |
| Give coastal and exposed sites closer fixing checks | Higher wind loads place more demand on straps and tie-downs, so the fixings deserve more attention on exposed blocks. |
Why Timber Framing Defects Are Missed at Handover
A handover inspection checks the finished product, and the finished product is designed to hide the structure. Plasterboard, insulation, cornices and tiles all cover the frame, so by handover most of the timber is out of sight. Timber remains the most common material for residential roof framing in Australia, and the AS 1684 timber framing code governs how it is sized and fixed.
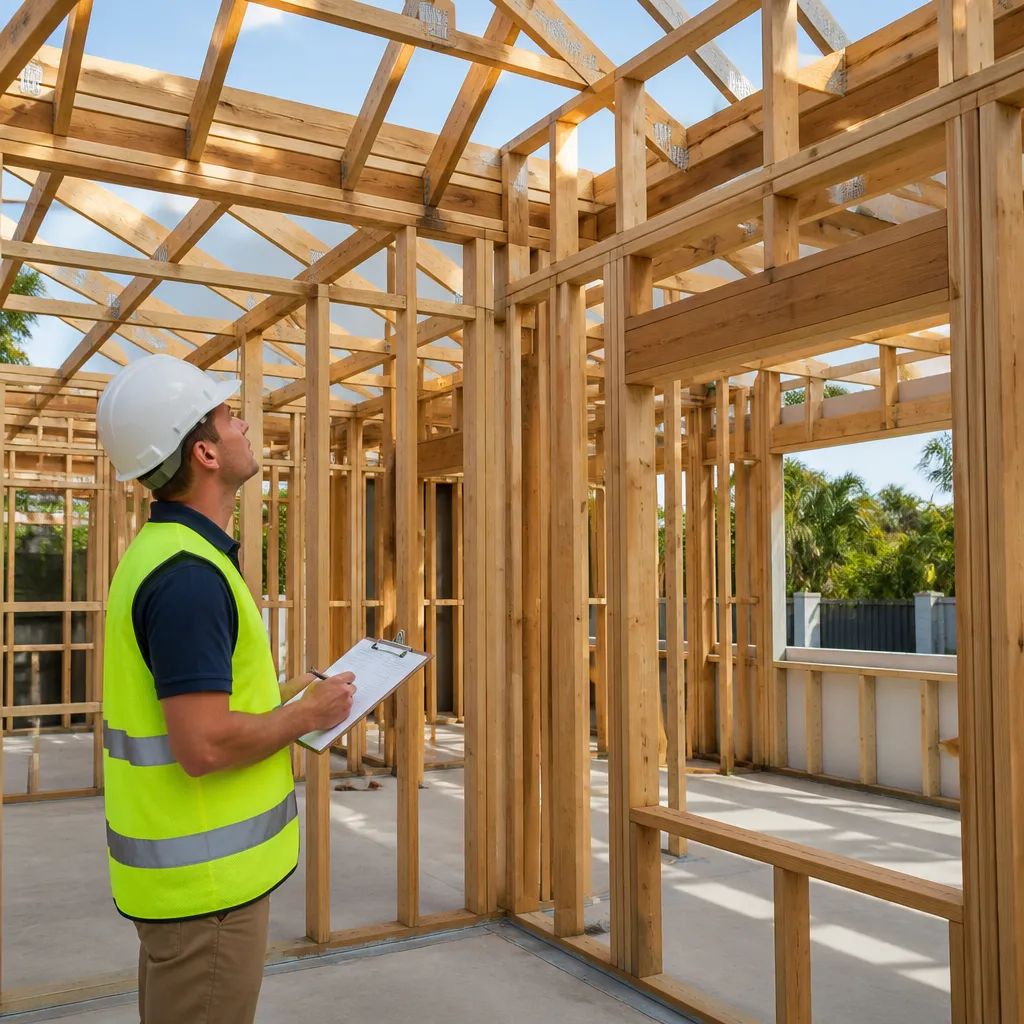
In practice, the frame stage is the only point where an inspector can see every stud, plate and connection before it disappears. Once the lining goes on, checking a tie-down means cutting into a wall, which most builders will not allow and most buyers will not want. A framing defect found at lockup costs a few hours of rework. The same defect found after lining can mean opening walls, replacing finishes and re-inspecting several trades.
A 2024 study of post-construction defects in multi-unit Australian dwellings, published in MDPI, reported 11 key defects in local apartment buildings. Waterproofing, internal finishes and structural problems were among the categories highlighted. Apartments are not houses, but the pattern is familiar: the defects that are hardest to fix are often the ones nobody checked while the work was still open.
The cheapest time to find a framing defect is while the frame is still open. Every week after lining makes the fix more expensive and the evidence harder to see.
Pro tip: Ask your builder for the frame-stage inspection date in writing. If the frame was never inspected before lining, you have lost your best window to check the structure, and you should plan a more thorough handover check.
Bottom-Plate Tie-Downs and Wall Plate Fixings
The fixings that resist uplift are the first thing I check on a frame, and the last thing most buyers have heard of. Wall plates are the horizontal timbers fixed to the top of load-bearing walls, and they must be securely fixed with straps or anchors to resist uplift from wind. The design wind actions come from AS/NZS 1170.2, and a frame that looks solid can still fail in a storm if those straps are missing or undersized.
What a Tie-Down Actually Does
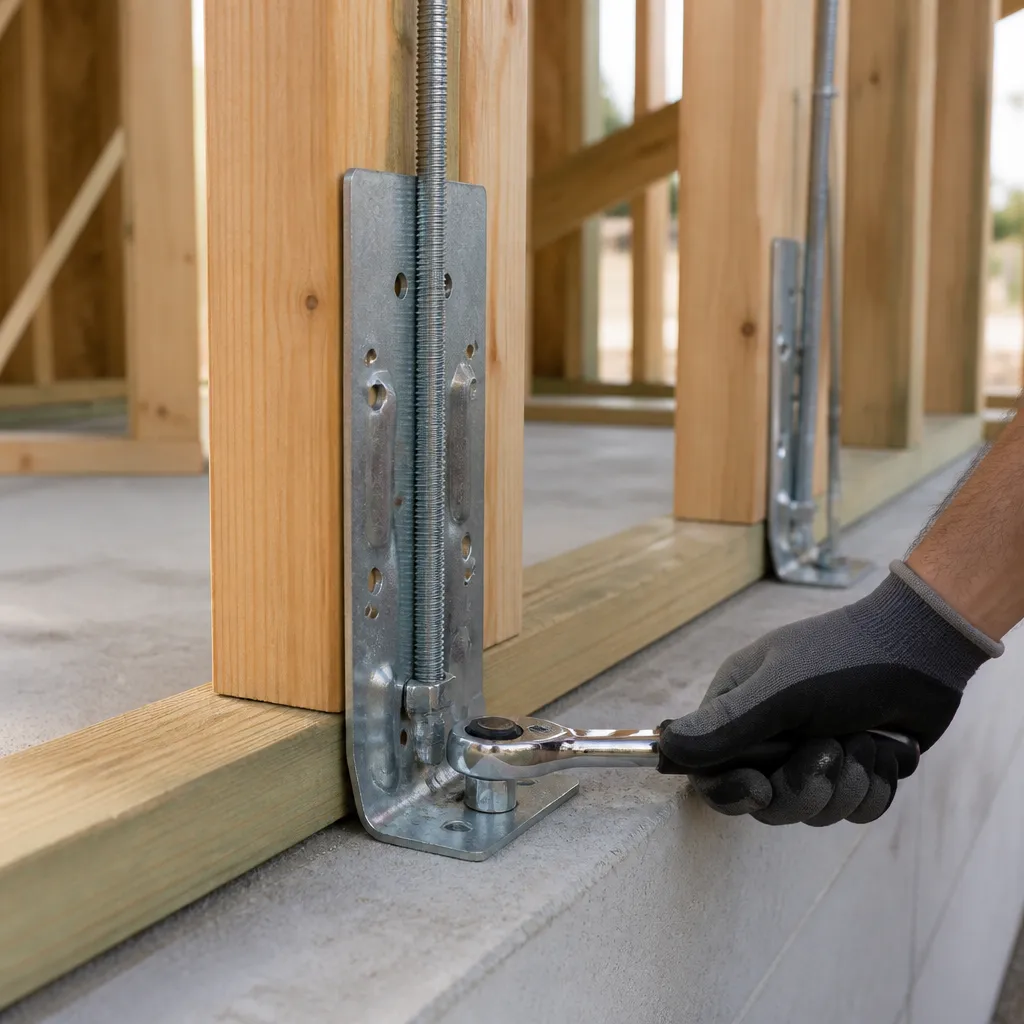
A tie-down is a connection that holds the bottom plate of a wall to the slab or the subfloor structure beneath it. It is usually a threaded rod with a hold-down bracket, and it stops the wall lifting or sliding when wind pressure pushes on the roof. Without that link, the roof load and wind uplift travel through a path that was never designed to carry them.
On a slab-on-ground house, the rods are cast in or fixed to the slab before the frame goes up. Check that the rod is present, that it sits in the right position relative to the plate, and that the nut and washer are tightened. A rod that sits in the slab but is not connected to the plate is a common finding, and it is invisible once the wall is lined.
Wall Plate Straps and Uplift
Wall plate straps connect the top plate to the rafters or trusses above and the wall below. In practice, the most common gaps are straps missing at one end of a wall, straps fixed with too few nails, and straps bent over a corner where they cannot grip. Each of these looks finished from the outside and fails the job of holding the roof down.
Sites closer to the coast can see higher wind loads than sheltered inland blocks, and that matters for fixings. Ask the builder which wind design basis the plans were drawn for, then compare the straps and anchors against that basis. A frame built for a milder site but installed on an exposed block is a serious defect, even if the house looks perfect.
Signs of Under-Fixed Walls After Handover
Under-fixed walls rarely fail on day one. The first signs are usually cracks at the junction between a wall and the ceiling, doors that begin to rub after a windy season, and gaps that open at the top of a wall during a storm. If you see any of these in the first year, record them with dated photos and raise them with the builder before the defects period expires.
Stud Grade, Spacing and Stud-to-Plate Connections
Studs are the vertical members that make up each wall, and most framing defects that inspectors flag involve the size, grade or spacing of those studs. The plans specify all three. A frame that looks straight can still be built with the wrong timber, and you need the documents to tell the difference.
Checking Stud Grade Against the Plans
Every stud should carry a grade stamp, and the grade should match the specification on the frame drawings. Inspectors look for mixed grades on the same wall, untreated timber in locations that require treatment, and studs that are visibly warped or split. A split stud near a load point is a defect even if it has been screwed back together.
Ask your inspector to photograph stamps from several walls, not just the front elevation. Substitution often happens at the back of the house or in rooms that will be lined first. A photo record is the only way to prove later what was installed.
Stud Spacing and Noggings
Stud spacing controls how the wall carries load and how the lining is supported. Measure centres at several points along a wall, especially near openings, where the frame has to carry concentrated loads over doors and windows. Spacing that drifts bay by bay can add up to a visible gap in the plasterboard and a weaker wall overall.
Noggings are the short horizontal pieces fixed between studs. They stop studs twisting and give the lining something to fix into. Missing noggings are easy to overlook because they sit low in the wall, and they are one of the first things I check at the frame stage.
Stud-to-Plate Connectors
Stud-to-plate connectors join each stud to the top and bottom plates. They are small, they are often hidden under a brace or a service run, and they are easy to skip when a framing crew is working to a tight program. Check that each stud has a connector at both ends and that the fixings are the right type and number.
Pro tip: Photograph each connector with a tape measure or pen in the frame for scale. A close-up with a reference object is far more useful in a dispute than a wide shot of the whole wall.
Roof Framing: Rafters, Ridge Beams and Purlins
Roof framing carries the covering, the wind load and any extra weight the owner adds later, such as solar panels. Rafters are the main inclined beams that run from the ridge down to the wall plate, and they must be sized and spaced according to the span tables in AS 1684. If the rafters are wrong, the roof can sag, and the defect may not show until the first heavy rain or the first hot summer.
Rafter Spacing and Sag
Sight along the roof from the eaves and look for dips in the line of rafters or the ridge. A dip that is visible from the ground is a serious finding. Check the roof space too, because a sagging rafter often shows up as cracking in the ceiling plasterboard near the walls below.
In practice, I look for rafters that have been notched, split or cut to fit around services without a repair detail. Extra loads from solar panels, water tanks or a future second storey need to be checked against the framing design, not assumed to be fine.
Ridge Beams Versus Ridge Boards
Not every roof has a ridge beam. Some use a ridge board, which is a non-structural timber that the rafters are nailed to. A structural ridge beam is needed for larger spans or specific roof designs, and it must comply with engineering requirements.
The problem arises when a roof designed with a structural beam is built with a ridge board, or the other way around. Check the frame drawings for the ridge detail, then confirm on site that the member installed matches it. A substitution here changes how the whole roof carries load.
Purlins and Bracing
Purlins run perpendicular to the rafters and support the roof battens or sheeting in some roof types. They are often steel or timber, and their connections are worth checking closely because they are hard to reach once the roof is finished. Look for missing bracing and fixings that look rushed, particularly where the roof meets a hip or a valley.
Floor Framing and Subfloor Bearers
The floor frame is easy to overlook at handover because you walk on it, and it feels solid. Problems in the floor frame show up as bouncy boards, sticking doors and floors that slope toward one corner. Those symptoms usually trace back to bearers, joists or the connections between them.
Bearers and Joists on Stumped Homes
On a stumped house, the bearers sit on the stumps and carry the joists above. Check that each stump is seated and that bearers are fixed to it with the correct hardware, not nailed or sitting loose. A stump that has been packed with offcuts or loose brick is a defect that will move over time.
Check the spacing of joists against the plans, and look for splits or notches where plumbing or electrical runs have been cut through the timber. A notch cut into the wrong part of a joist can reduce its capacity more than most homeowners expect.
Floor Levels and Slope Checks
A floor that slopes beyond the tolerance in the plans usually points to a frame or slab problem. Use a long spirit level or a laser level across several rooms, and record the readings. A slope that is visible to the eye at handover tends to get worse in the first year, not better.
Some buyers accept a slight slope because they assume the slab is to blame. Ask the builder to confirm which element sets the level before you accept the answer. Frame and slab defects need different repairs, and the responsibility sits with different trades.
Comparing Framing Inspection Approaches
There are three common ways to check the timber frame of a new home, and each one catches different defects. A handover walkthrough is the most common, but it is the weakest for structure. A frame-stage inspection with photos is the strongest for hidden connections, provided it happens before the lining goes on.
| Approach | What It Catches | What It Misses |
|---|---|---|
| Handover walkthrough only | Finish defects, doors, windows, visible cracking and obvious slopes | Tie-downs, straps, stud connectors and any framing hidden by lining |
| Frame-stage inspection with photos | Missing tie-downs, stud grade, spacing, noggings and connector gaps before they are covered | Changes made after the inspection date, and work covered before the visit |
| Plan review against the built frame | Mismatches between the design and what was installed, such as ridge detail or bearer size | Workmanship issues like a strap nailed short, unless someone checks the site as well |
The strongest approach combines the second and third. A frame-stage inspection gives you the photographic record, and a plan review tells you whether the frame matches the design. Neither replaces the other, and neither is useful if it happens after the walls are closed.
In practice, many buyers rely only on the handover walkthrough because it is part of the standard process. That is the approach that leaves the most defects hidden. If your builder allows a frame-stage visit, book it, and ask for the photos in the same report.
Assigning Responsibility for Framing Defects
A defect report only helps if it tells the builder who needs to fix what. A note that says a wall is out of alignment gives the builder nothing to act on. A report that says a stud-to-plate connector is missing at one end of a stud in bedroom two, with a photo, gives the framing contractor a clear job.

Why Trade Attribution Matters
Framing defects usually belong to the framing contractor, but the builder holds the contract and manages the subcontractors. If a report does not name the trade, the builder can say the defect belongs to someone else, and the delay falls on you. Attribution by trade keeps the rectification moving.
Our reports assign each defect to the trade most likely responsible, based on what was built and when it was built. That is not a legal finding, but it gives the builder a starting point and a clear list to work through.
Documenting Defects for Rectification
Good documentation means a photo of the defect, a reference to the plan or specification, the location in the house, and a short description of the fix needed. Photo-enhanced reports make this quick to read, and same-day reporting means the builder receives the list while the crew is still on site.
Keep your own copy of every report and every reply from the builder. If a defect is rectified, ask for the re-inspection photos. If it is not, your written record is what you will rely on later.
Timing a Re-Inspection
Book a re-inspection once the builder confirms the rectification is complete, not when the crew says they are nearly done. A repair that was never checked is only a promise. Re-inspections are usually narrower in scope than the first inspection, which keeps the cost down.
Pro tip: Write every defect in the report as a fix, not a complaint. “Install missing stud-to-plate connector at the end of the stud in bedroom two, both ends” gets done faster than “framing looks poor”.
Frequently Asked Questions
When should a timber frame be inspected in a new Queensland home?
The most useful window is the frame stage, after the framing is complete and before insulation and lining are installed. A second check at practical completion or pre-handover catches finish and fit issues. If you can only do one visit, the frame stage gives you the best chance to see the connections that matter most.
Can I check tie-downs myself before handover?
You can look for the rods and brackets in the subfloor or at the slab edge, but you cannot confirm the connection is correct without opening the wall. A licensed inspector with a clear plan reference is the better option. Ask them to photograph the connections at the frame stage.
What is the difference between a stud and a nogging?
Studs are the vertical members that carry load from the top plate to the bottom plate. Noggings are short horizontal pieces fixed between studs to stop them twisting and to support the lining. A missing nogging is less serious than a missing stud, but it still affects how the wall performs.
Are ridge boards and ridge beams interchangeable?
No. A ridge board is non-structural and holds the rafter ends in position. A structural ridge beam carries load and is needed for larger spans or certain roof designs. If the plans call for a beam and the site has a board, the roof needs an engineering review before you accept it.
How much does a framing inspection cost, and is it worth it?
GoInspect inspections start from $550 including GST, and the final price depends on the size and complexity of the job. Compared with rectifying a missing tie-down or an unsupported roof after lining, a framing check is usually a small cost. Ask for a quote based on your project’s scope.
Does a timber frame defect always mean the house is unsafe?
No, but every defect needs a decision. Some are cosmetic, while others affect how the frame carries wind or load. The right response is to have a qualified person assess the defect and tell you whether it needs structural engineering input.
Have you found a framing problem in your own new home, and how did your builder respond? We would like to hear about your experience.