
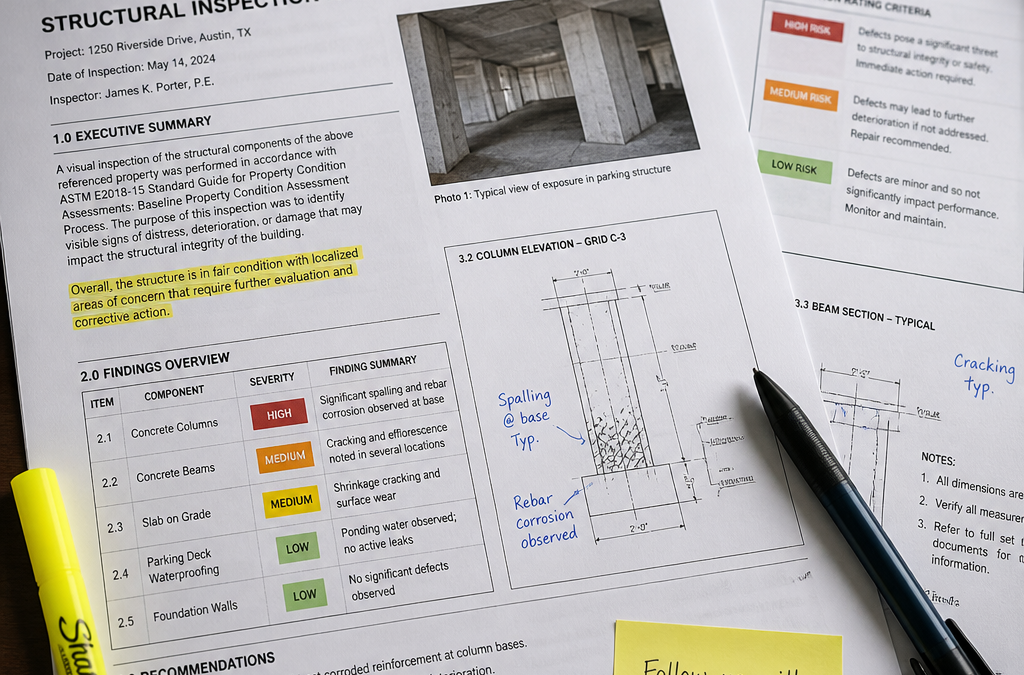
You have just received your new home inspection report. It is 40, 60, maybe 80 pages long, packed with technical language, severity ratings, and photographs of things that look wrong but you cannot quite name. If you are a first home buyer in Brisbane, the Gold Coast, or anywhere in South East Queensland, this document represents the single most important piece of paper between you and a potentially costly mistake. Understanding what a defect inspection report actually says, and how to act on it, is not optional. It is the difference between walking into your new home with full knowledge and walking into someone else’s problem.
Table of Contents
- Quick Takeaways
- What Is a Defect Inspection Report?
- Anatomy of a New Home Inspection Report
- Defect Severity Categories Explained
- How Photo Evidence Changes the Report
- Reading the Report Section by Section
- What to Do After Reading Your Report
- Comparing Report Styles and Formats
- Frequently Asked Questions
- References
Quick Takeaways
| Key Insight | Explanation |
|---|---|
| Start with severity, not page one | Jump directly to the major defects section first. That is where your decisions are made. Everything else is secondary reading. |
| A defect report does not include repair costs | The report identifies and categorises defects but will not tell you what they cost to fix. You need to obtain quotes separately from licensed tradespeople. |
| Photographs are your most useful tool | Photo-enhanced reports let you match each written finding to a specific location on-site, which is essential when discussing rectification with your builder. |
| In Queensland, builders must rectify defects noticed at handover or within 12 months of completion | The QBCC confirms this obligation. A documented defect list signed at handover is your legal record and the basis for any rectification request. |
| Not every item in the report is a negotiation point | Maintenance items and minor cosmetic findings are normal in any new build. Structural defects, failed waterproofing, and electrical non-compliance are the items that require action. |
| Trade responsibility annotations speed up rectification | Reports that assign each defect to a specific trade, such as the plasterer, tiler, or electrician, allow the builder’s site supervisor to coordinate repairs without confusion about who is responsible for what. |
| Pre-handover is the best time to inspect, not after you move in | Once you accept handover and make the final payment, your legal position changes. Defects documented before that moment are the builder’s contractual obligation to fix. |
What Is a Defect Inspection Report?
A defect inspection report is a formal written document produced by a licensed building inspector after a thorough on-site assessment of a property’s condition. For new homes specifically, this is most commonly produced at practical completion, the stage at which a builder considers the construction work finished and is ready to hand the home over to you.
In Australia, these reports are prepared in accordance with Australian Standard AS 4349.1, which sets out what an inspector must examine, how findings must be categorised, and what limitations must be disclosed. The standard means that a report produced by a qualified inspector in Brisbane carries defined scope and methodology, not just one person’s opinion.
For first home buyers in South East Queensland, there are three common inspection types where a formal defect report is produced: a pre-handover inspection (before you take possession), a pre-settlement inspection (for off-the-plan purchases, before settlement completes), and a practical completion inspection (the formal walk-through at the end of construction). GoInspect delivers all three across Brisbane, Gold Coast, Logan, Ipswich, and Redland Bay, with same-day reporting so you have your findings in hand before any handover meeting.
Anatomy of a New Home Inspection Report
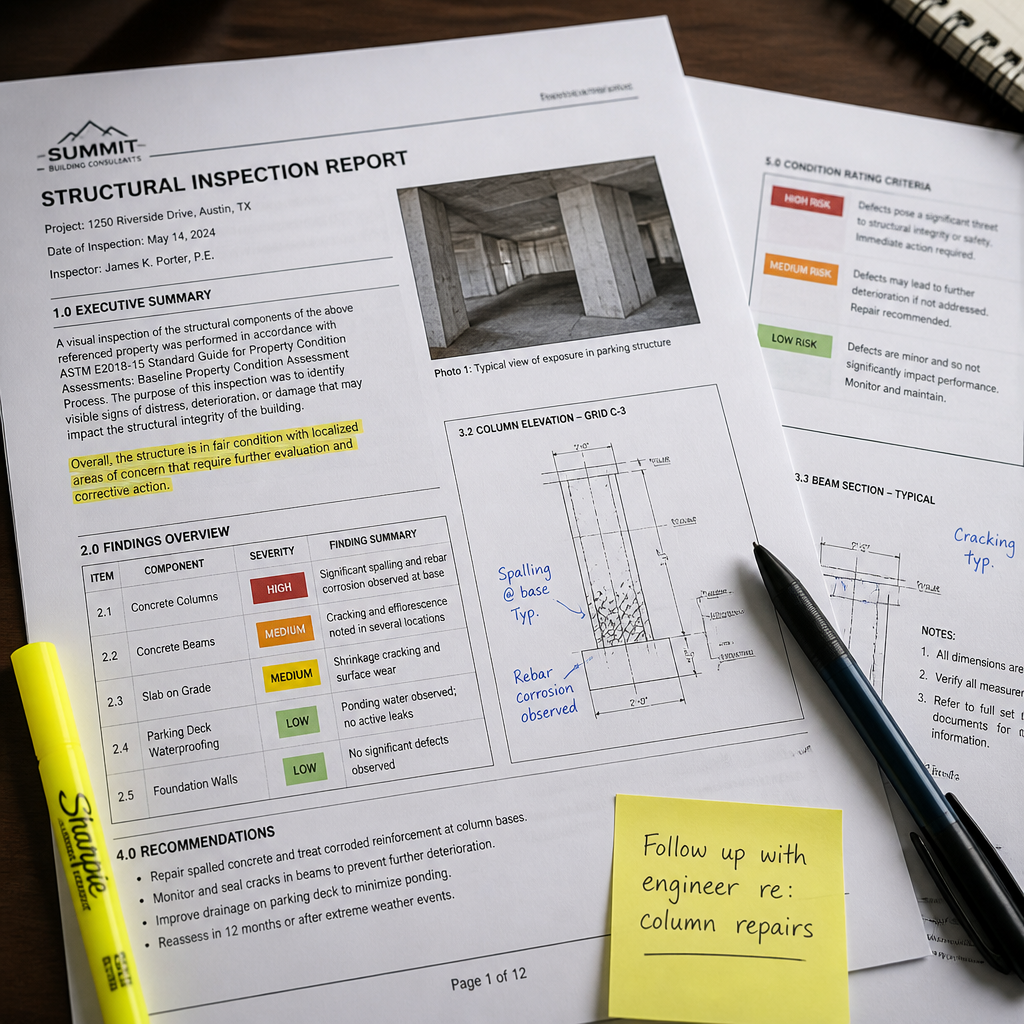
Most first home buyers open their report and start reading from page one, which is usually the cover page, inspector credentials, and scope limitations. That is the least useful place to start. Understanding how a report is structured tells you exactly where to look and in what order.
The Executive Summary or Defects List
This is your entry point. A well-structured new home inspection report will open with a summary of all identified defects, grouped by severity. This section is designed to give you a fast, clear picture of the property’s condition without requiring you to read every detailed observation. If your report does not have a summary section, that is itself a signal about the quality of the report you have received.
Property and Inspection Information
Before the defect findings, you will find basic identifying information: the property address, the type of construction, the date and time of inspection, and details of the inspector’s licence. This section also documents the conditions under which the inspection was conducted, such as weather and access limitations. Do not skip it. If the inspector could not access the roof cavity or subfloor, the report’s findings in those areas are limited, and you need to know that before you act.
Detailed Findings by Area
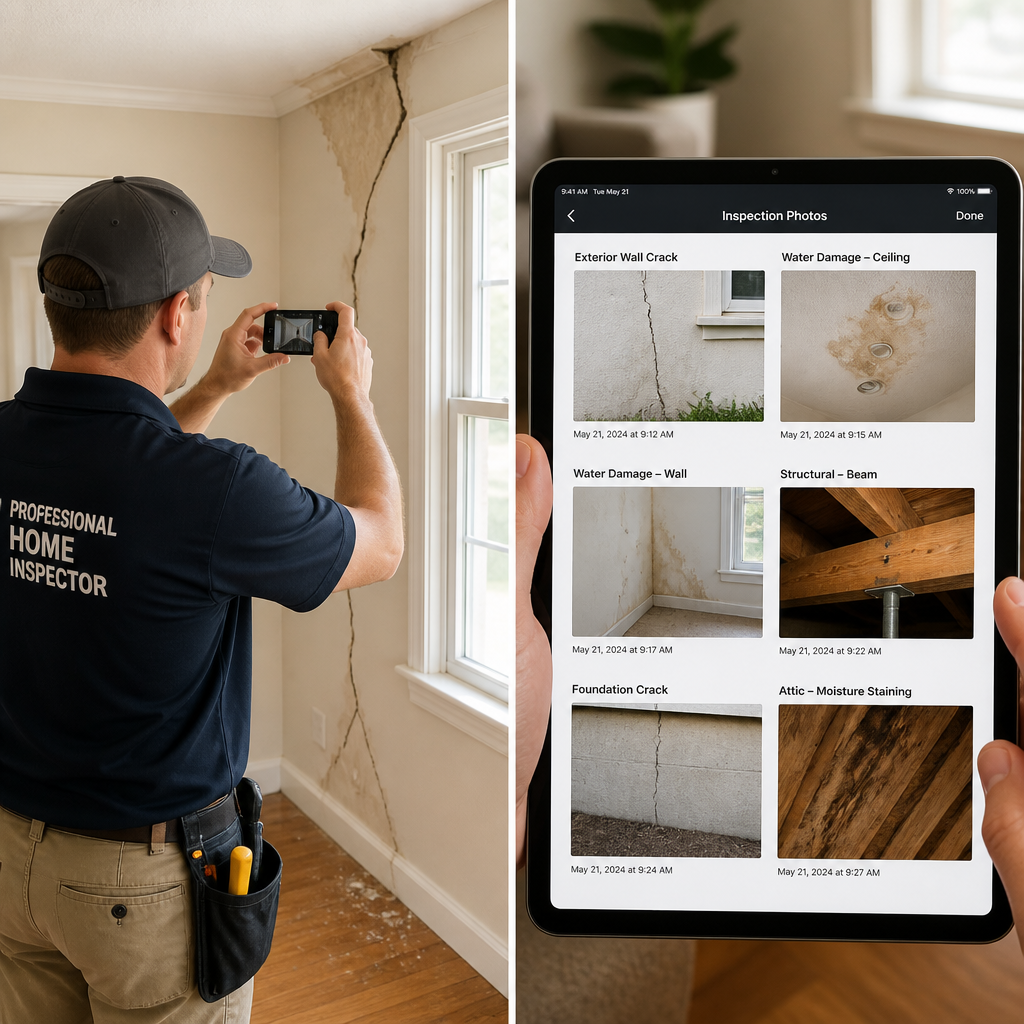
The main body of the report organises findings by location. Expect separate sections covering the slab and structural frame, external walls and roof, interior finishes, wet areas, electrical installations, and plumbing. Each finding will include a description of the defect, its location, and a severity rating. In a photo-enhanced report, each finding is paired with a photograph that shows exactly what the inspector observed and where.
Trade Responsibility Annotations
This is a feature you will not find in every report, but it is one of the most practically useful. GoInspect’s reports assign each defect to the responsible trade, whether that is the plasterer, tiler, concreter, electrician, or roof plumber. When your builder’s site supervisor receives a report that is already organised by trade, coordinating repairs is far faster than working through a generic list of issues with no clear ownership.
Pro tip: When you receive your report, count how many defects are assigned to wet areas. Tiling lippage, incorrect drainage falls, and failed waterproofing in bathrooms and balconies are among the most expensive defects to rectify in a new home, and they are consistently found in volume builds across Brisbane and the Gold Coast.
Defect Severity Categories Explained
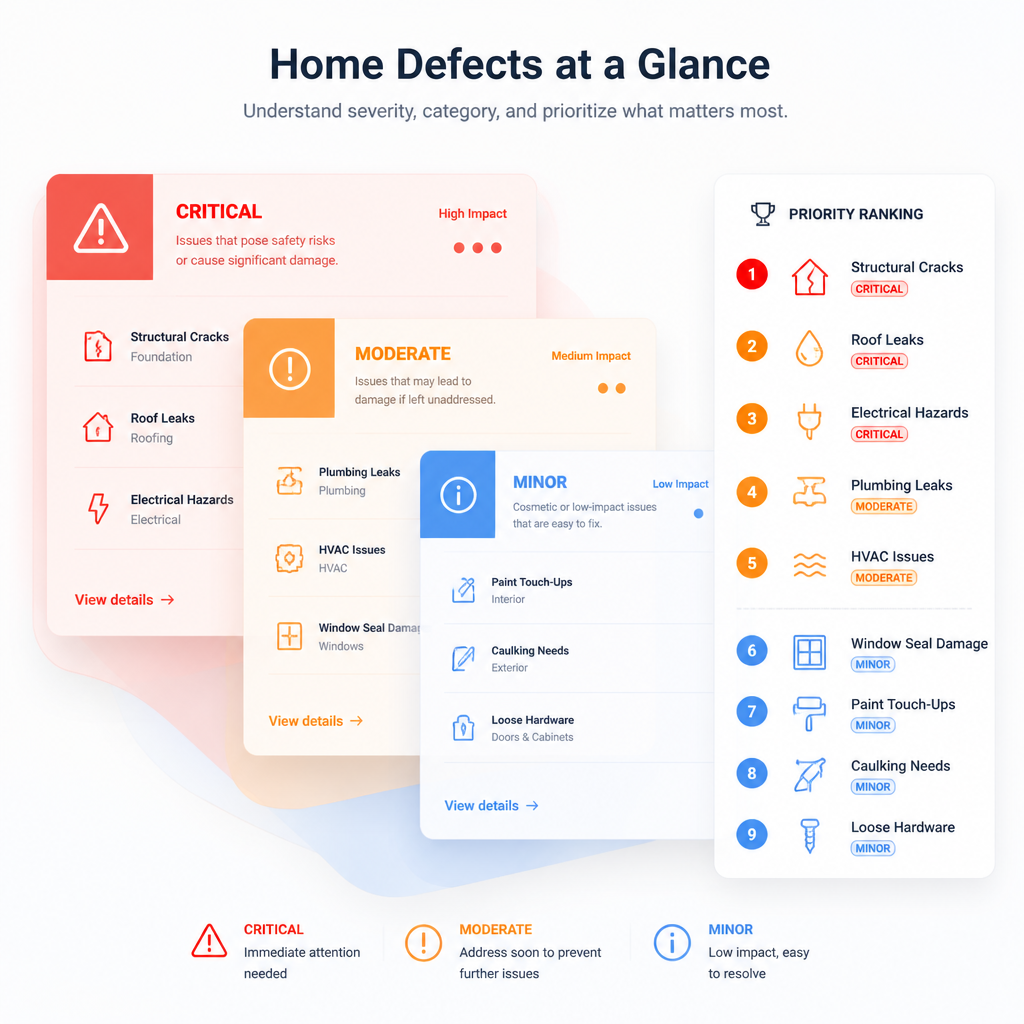
The most important skill for reading a new home inspection report is understanding the severity classification system. Every finding in the report will carry a category label, and that label determines how urgently you need to act and what your legal options are.
Major Defects
A major defect is a finding that requires urgent remedial work and, if left unaddressed, could cause the loss of use of the building or part of it, or present a risk to the occupants’ safety. In a new home context, examples include structural cracks in the slab, non-compliant electrical installations, roof frame issues, and water ingress into the building envelope. Major defects are your non-negotiables. They must be rectified before you accept handover, and they form the core of any formal dispute with a builder.
Minor Defects
Minor defects are items that fall below the standard required by your contract or by acceptable industry workmanship standards, but do not immediately threaten the structure or safety of the home. Plasterwork cracking, paint finishing imperfections, cabinetry alignment, and tiling lippage are typical minor defects in new builds. These are still the builder’s responsibility to fix. Do not dismiss them simply because the word “minor” appears. A new home should be delivered to the standard you paid for.
Maintenance Items
These are observations about normal wear or items that will require attention over the life of the home but are not defects in the construction sense. Sealant around fixtures, weatherstripping, and minor surface scuffs fall here. You should note these for your own records, but they are not items to pursue with your builder at handover.
A defect report is not a pass or fail document. It is a prioritised list of what needs attention, in what order, and by whom. How you read it determines how effectively you use it.
Safety Hazards
Some reports use a separate “safety hazard” classification for findings that present an immediate risk, such as exposed electrical wiring, improperly installed balustrades, or structural elements that are unstable. These sit above major defects in urgency. If your report contains a safety hazard finding, do not take occupation of the home until that item has been rectified and re-inspected.
How Photo Evidence Changes the Report
There is a significant practical difference between a text-only defect report and a photo-enhanced defect report. Many first home buyers do not realise this until they try to use a text-only report in a builder meeting and find themselves unable to point to the specific location of a documented defect.
A photograph in a defect report does three things: it proves the defect existed at the time of inspection, it locates the defect precisely so the right tradesperson can find it, and it creates a before-and-after comparison once rectification is claimed to be complete. Without photographic evidence, a builder can simply say the item was not there, or that it has already been fixed, with no way to dispute either claim.
GoInspect’s reports are built around this principle. Every finding is paired with a photograph, and the report is delivered the same day as the inspection. That same-day turnaround matters in a practical sense because handover meetings in Brisbane and the Gold Coast are often scheduled with short notice, and buyers who are still waiting for their report when the builder calls are at an immediate disadvantage.
Pro tip: Before your handover meeting, print a physical copy of your photo-enhanced report and tab the major and minor defect pages. Handing a builder’s supervisor a clearly organised, photo-documented list of defects with trade responsibility already assigned shortens the meeting and removes any ambiguity about what you expect to be fixed.
Reading the Report Section by Section
This is the practical reading sequence that experienced home buyers and property investors use. It is not the order the report is written in. It is the order that gives you the clearest picture, the fastest.
Step 1: Read the Summary First
Go directly to the executive summary or defect list at the front of the report. Read the major defects. Count them. Note which areas of the home they relate to. This gives you the context you need before you read any individual finding in detail. A report with 30 minor defects and zero major defects is a very different document from one with four major defects and fifteen minor ones.
Step 2: Review the Major Defect Findings in Full
For each major defect, read the full description, locate the photograph, and identify which trade is responsible. Ask yourself whether this defect is something the builder can realistically rectify before handover, or whether it represents a deeper construction problem that will require specialist assessment. The QBCC confirms that a contractor must repair defects noticed at handover, which is why this list needs to be documented and agreed to before you sign anything.
Step 3: Work Through Minor Defects by Trade
Group the minor defects by trade and read them in that order. This mirrors how the builder will need to coordinate repairs. It also helps you spot patterns. If there are 14 plasterwork defects spread across multiple rooms, that is a workmanship quality issue, not a collection of isolated accidents. Patterns matter when it comes to negotiating a realistic rectification timeline.
Step 4: Check the Wet Areas Section Carefully
Failed waterproofing, incorrect drainage falls, and moisture readings in wet areas deserve specific attention in any new build report. These are expensive to fix after occupation and can cause progressive damage if left unaddressed. If your report flags moisture in a bathroom, balcony, or laundry, treat it as a major item regardless of how it has been classified, and seek specialist advice before proceeding.
Step 5: Note the Scope Limitations
Every inspection has areas that could not be accessed or assessed. Read these limitations carefully. If the roof cavity was not inspected, or the inspector could not access the underfloor space, those are blind spots in your knowledge. You may need a follow-up inspection to cover those areas before handover is complete.
What to Do After Reading Your Report
Reading the report is the first step. Knowing what to do with it is where most first home buyers lose ground. Here is the sequence that protects you.
First, contact your inspector before the handover meeting. A qualified inspector can walk you through the major findings, explain technical terms in plain language, and advise on which items require specialist follow-up. GoInspect’s fully licensed inspectors are available to discuss your report, which matters when you are trying to understand whether a structural observation is a routine new build issue or a genuine concern.
Second, prepare a formal defect list to take into your handover meeting. Your inspector’s report is the source document. The defect list is the working document you present to the builder. It should list every major and minor defect, reference the report section and photograph for each one, and specify which trade is responsible. The QBCC states that all defects, incomplete work, and items not built to specification should be documented in a defects list that is usually signed by both parties at the inspection. That signed list is your legal record.
Third, do not accept handover if major defects remain unresolved. Under Queensland building law, a contractor must repair defects noticed at handover or within 12 months of when the work is finished. But your strongest position is always before you sign. Once you take possession and make the final payment, your leverage over the builder’s timeline is significantly reduced.
Fourth, schedule a follow-up inspection before the 12-month defects liability period expires. A further inspection before this deadline documents any defects that have appeared since handover, which the builder remains obligated to rectify under Queensland statute.
Comparing Report Styles and Formats
Not all new home inspection reports are built the same way. Understanding the differences helps you assess whether the report you have received is actually useful or just technically compliant.
| Report Type | What It Typically Includes | Practical Usefulness for Rectification |
|---|---|---|
| Basic text-only report | Written descriptions of defects, severity ratings, general area references, no photographs, no trade annotations | Low. Difficult to use in builder meetings because defects cannot be pinpointed on-site and there is no photographic record of condition at time of inspection. |
| Standard photo report | Written descriptions with supporting photographs, severity ratings, and area-by-area organisation in line with AS 4349.1 | Medium. Photos help locate and evidence defects, but without trade assignment the builder’s team must still determine who rectifies what. |
| Photo-enhanced report with trade responsibility annotations | Written descriptions, photographs linked to each finding, severity ratings, specific trade assigned to each defect, same-day delivery | High. Provides everything a builder’s site supervisor needs to coordinate rectification efficiently. Reduces disputes about responsibility and speeds up the rectification process. |
GoInspect’s reports fall into the third category. For new home buyers in Brisbane and surrounds who are facing a handover meeting with a volume builder, a report that identifies the defect, evidences it photographically, and names the responsible trade removes the most common arguments builders use to delay repairs.
Frequently Asked Questions
What does a defect inspection report actually cover in a new Queensland home?
A defect inspection report for a new home in Queensland covers the structural elements including the slab, walls, and roof frame, interior finishes such as plasterwork, tiling, paintwork, cabinetry, and flooring, wet areas including bathrooms, laundry, and balconies, electrical installations, and plumbing. The inspection is conducted in accordance with Australian Standard AS 4349.1-2007, which defines the scope and methodology. Each finding is categorised by severity and, in a quality report, supported by photographs and trade responsibility assignments.
How is a pre-handover inspection different from a practical completion inspection?
They refer to the same event from two different perspectives. A practical completion inspection (PCI) is the formal walk-through your builder schedules when they consider construction finished. A pre-handover inspection is the independent inspection you commission before that meeting, conducted by a licensed inspector working on your behalf rather than the builder’s. Doing your own independent pre-handover inspection before the PCI meeting means you arrive with a documented defect list prepared by someone who is not affiliated with the builder, which is a fundamentally stronger position than identifying defects on the spot during the builder’s own walk-through.
My report has 30 items listed. Does that mean the home is badly built?
Not necessarily. Volume-built homes routinely carry a significant number of minor defects at completion because multiple trades work in parallel under production schedules. What matters is the nature of the defects, not the raw count. A report with 30 minor finishing items and no major structural or waterproofing defects is a very manageable outcome. A report with five items that include structural concerns, failed waterproofing, or electrical non-compliance is a far more serious document, regardless of how short it looks. Always read by severity first, not by volume.
Can I use my defect inspection report to negotiate with my builder?
For new homes, the report is less about negotiation and more about legal obligation. In Queensland, the builder is contractually and statutorily required to rectify defects documented at handover. The report and the defect list you present at the handover meeting are the formal record of what must be fixed. You are not asking the builder to give you something as a favour. You are documenting their obligation to deliver the home at the standard your contract specifies. Where the report adds negotiating value is in situations where defects are discovered after settlement and you are pursuing rectification within the defects liability period.
What should I do if the builder disputes a finding in my defect report?
A photo-enhanced report with trade responsibility annotations is your strongest resource in a dispute. The photograph establishes that the defect existed at the time of inspection, and the written description provides the basis for assessing it against contract specifications and acceptable workmanship standards. If the builder continues to dispute a finding, you can seek a second opinion from another licensed inspector or refer the matter to the Queensland Building and Construction Commission (QBCC), which handles disputes between homeowners and licensed builders. Do not accept verbal assurances that something will be fixed. Everything should be documented in writing.
When is the right time to get a defect inspection on a new home?
The most important time is before handover, ideally two to three days before your scheduled practical completion inspection with the builder. This gives you time to receive the report, review it, and prepare your defect list before you walk into that meeting. A second inspection before the end of the 12-month defects liability period is also strongly recommended, as some defects only become visible after the home has been occupied and experienced normal seasonal movement and weather exposure.
Have you recently received a defect inspection report on your new home? Share what part of the report you found hardest to interpret and how you resolved it with your builder.
References
- Queensland Building and Construction Commission guide to practical completion inspections and builder defect obligations
- How to read and act on a home defect inspection report, including defect rectification and prioritisation for Australian property buyers
- Understanding your property inspection report: structural findings, severity ratings, and next steps under AS 4349.1
- Step-by-step guide for Australian buyers on how to triage a building inspection report before cooling-off ends
- Practical completion in Queensland: QBCC rules, defects liability periods, and contractor rectification obligations explained