
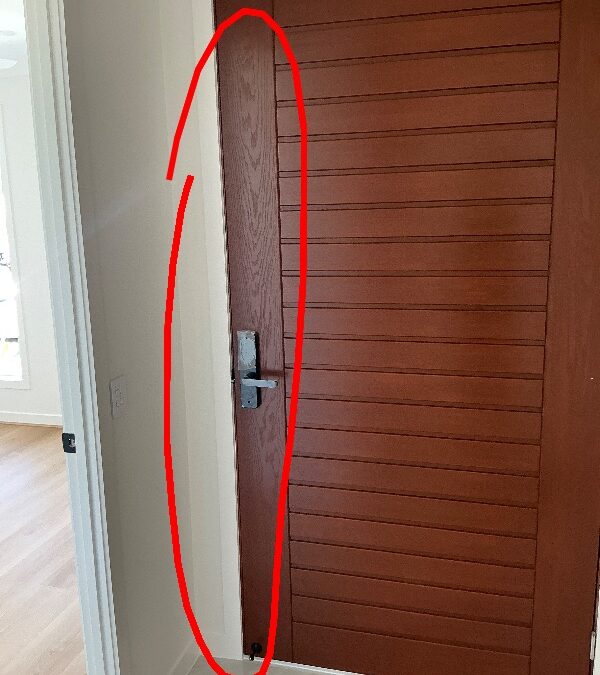
Book a pre-paint inspection when the relevant plasterboard, doors, trims and fixing work are in place, before final painting and finishing obscure some details. Ask your builder what will be complete and what will be covered next. The right date depends on the work available to inspect, rather than the stage name alone.
This pre-paint inspection checklist helps you prepare for that visit, identify useful questions and keep track of unfinished work. A pre-paint or fixing stage inspection checks work during construction; a practical completion inspection (PCI), often called a handover inspection, checks the substantially finished home later.
Takeaway: confirm readiness, provide the relevant plans and selections, and leave time to discuss the findings before the next trade starts.
When is the house ready for a pre-paint inspection?
Start with the supervisor’s actual program. Are wall and ceiling linings installed? Has the relevant jointing and finishing work been completed? Are doors, jambs, architraves and skirtings fitted? Which cabinets, benchtops and tiled areas will be available?
A visit booked too early may mainly record work that is still underway. A visit booked after painting can still identify visible concerns, but it cannot recreate the earlier view. Ask the builder to distinguish work ready for assessment from work scheduled for completion afterwards.
GoInspect’s construction stage inspection service describes pre-paint checks of visible linings, trims, doors, joinery and other completed work. Confirm your particular scope and access before choosing a date.
Pre-paint is different from pre-plaster
A pre-plaster or pre-lining visit takes place before the relevant wall or ceiling lining is fixed. A pre-paint visit generally happens after those linings are installed. Mixing up the names can mean missing the opportunity to see the work you wanted checked.
If your concern is exposed framing, insulation or waterproofing before covering, raise it early and agree an appropriate inspection point. Do not assume those details remain visible at pre-paint. Our new-home inspection stages guide explains the wider sequence.
A practical fixing stage inspection checklist
1. Walls, ceilings and plasterboard finishing
Check accessible surfaces for incomplete joints, pinholes, rough patches, damaged corners and unfinished junctions around openings. Note the room and precise area rather than writing “plaster needs attention” for the whole house.
Compare the work with the specified finish. Gyprock explains that lighting, decoration and the selected level of finish affect the expected result. Its guidance describes Level 4 jointing as a three-coat system finished smooth, without tool marks or ridges. This is background guidance; it does not establish the brand or system installed in your home.
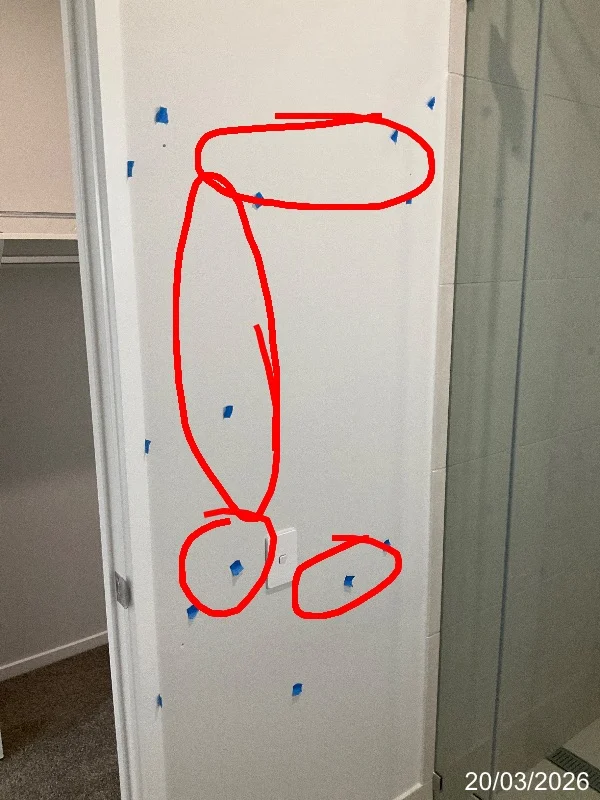
In this GoInspect handover finding, the inspector asked for pinholes in plaster joints around a light switch to be rectified. It illustrates a finishing concern to discuss before painting, where visible. All three photographed examples in this article were recorded at handover; they are not presented as photographs of a pre-paint visit.
2. Doors, jambs and hinges
Where doors are installed and ready to assess, check their operation, alignment and visible fitting. Record rubbing, binding, poor closure and unfinished hinge housings. Do not force a door or adjust its hardware yourself during the inspection.
The opening photograph shows an entry door that GoInspect recorded as binding on its frame. That is an operation finding, rather than a conclusion that the frame is structurally defective. Ask the builder to assess the cause and proposed adjustment.

A separate report asked for plaster to be removed from a bathroom door’s top hinge and for the hinge to be seated correctly in its housing. Cleaning residue and correcting the fit are specific tasks; a general paint touch-up instruction would not describe both.
3. Architraves, skirtings and junctions
Look for damaged trim edges, incomplete joins, visibly uneven fitting and unfinished junctions. Include corners, door openings and the ends of runs. Ask which finishing or sealing work is still scheduled so it can be followed up at the appropriate stage.
4. Cabinetry and joinery already installed
Compare installed cabinets and benchtops with the supplied plans and agreed selections. Record missing components, damage, alignment concerns and operation problems in doors or drawers that are ready to use. Keep incomplete installation items separate from defects in completed work.
5. Completed tiling, flooring and fixtures
Check what is actually installed and accessible: visible damage, unfinished edges, incomplete junctions and fittings needing attention. Record areas that cannot yet be assessed. Finished tiles do not reveal the full condition of concealed waterproofing, and a pre-paint booking does not automatically include a separate membrane inspection.
What should you send before the visit?
- Current plans, relevant specifications and approved variations.
- The builder’s expected readiness date and the next planned work.
- Selections relevant to installed doors, trims, cabinetry or finishes.
- Your specific concerns and any earlier inspection items needing follow-up.
- The supervisor’s contact details and site access requirements.
Coordinate the visit through the builder. Do not enter roof spaces, climb unfinished structures or remove fittings to make concealed work visible. The inspection covers the agreed visible and safely accessible work; specialist testing and certification are separate.
Turn the report into a clear response from the builder
Keep each finding’s location and photographs with the builder’s response. Ask whether the item will be repaired, needs clarification against the specification or requires another professional’s advice. Record a proposed completion point and how the result can be reviewed.
Some repairs will be available to check before painting; other items may remain for the finished-home visit. Keep unresolved findings on the list rather than assuming the next coat of paint closes them out.
Do you still need a practical completion inspection (PCI)?
The two visits answer different questions. A pre-paint inspection records work available at that construction stage. A later practical completion and handover inspection can assess the finished surfaces, fittings, visible damage and incomplete work within the agreed scope, including work completed after the earlier visit.
An independent report supplements the builder’s quality control and required certification. It does not grant occupancy approval, guarantee every defect will be found or decide a contractual payment dispute.
To plan your visit, check the inspection options for your property and tell us what will be complete. GoInspect’s online stage bookings cover eligible houses, duplexes and dual occupancies; units and townhouses require a separate enquiry about the appropriate service.