

If you are buying a new home in Springwood or Browns Plains, the most expensive problems are often the ones you cannot see at the handover walk-through. Cracked tiles under a fresh grout line, a shower that drains slowly, or a door that rubs against its frame usually show up only after you have settled in and moved your furniture. A new home inspection in Springwood catches these issues while the builder still has crews on site and the fixes are still cheap to arrange. This guide explains when to book, what to check, and how to turn your findings into a defect list that actually gets actioned.
Table of Contents
- Quick Takeaways
- Why South Logan New Builds Need a Local Checklist
- When to Book Your Inspection
- What Inspectors Check on a New Build
- Assigning Defects to the Right Trade
- Comparing Inspection Approaches
- Photo Evidence and Same-Day Reporting
- Local Conditions in Springwood and Browns Plains
- Following Up After the Inspection
- Frequently Asked Questions
- References
Quick Takeaways
| Key Insight | Explanation |
|---|---|
| Book within days of practical completion | Builders move crews to the next lot quickly. The sooner your inspection happens, the sooner defects can be booked back in while the trades are still nearby. |
| Test wet areas with water, not your eyes | Run every shower, flush every toilet and fill the basin. Then check the ceiling below the bathroom and the cabinet under the sink for staining. |
| Walk the outside before you walk the inside | Look for ponding near slab edges and confirm downpipes discharge away from the footings. Drainage faults are cheap to fix now and expensive later. |
| Ask for trade responsibility on every item | A note that says “bathroom finish” slows repairs. A note that names the waterproofer, the tiler or the plumber gives the builder something to act on. |
| Plan around late spring humidity and storms | October to December brings heat, humidity and sudden downpours. Check roof flashings, window seals and ventilation during the inspection, not just on a sunny day. |
| Keep the builder’s paperwork with your defect list | Warranties, compliance documents and appliance manuals are your evidence if a repair is disputed after settlement. |
| Do not rely only on the builder’s handover walk | The builder’s team has every reason to close the job. An independent inspection gives you a second, neutral view of the same home. |
Why South Logan New Builds Need a Local Checklist
Springwood and Browns Plains both sit within Logan City, south of Brisbane, and many new homes here are built on estates where several builders and trades may be working at the same time. That means site conditions, drainage and the weather during construction can vary from one lot to the next. A checklist written for a generic house in another state will miss the things that matter most in this part of south-east Queensland.

Start with the builder’s licence. Builders working in Queensland must hold a licence from the Queensland Building and Construction Commission (QBCC), so check the licence number and confirm it is current before you sign anything. This takes five minutes and tells you whether the builder is accountable under the state’s regulatory framework.
Local conditions also shape what you check. Humid, wet-season weather pushes moisture into timber, plasterboard and wall cavities, and a home that was framed and lined during a dry stretch can still show problems months later. A good inspection looks for early signs of this, not just the obvious defects visible on the day.
When to Book Your Inspection
Many buyers mix up two stages of the build, and the confusion costs them time. Practical completion is when the builder considers the home finished to the contract standard, apart from minor items. Pre-settlement is the stage closer to your settlement date, when the property is ready to transfer and you have a final chance to confirm its condition.
In practice, I recommend booking your inspection as soon as practical completion is confirmed and the site is clean enough to walk. Leave it until the week before settlement and you have little room to fix anything, because builder re-attendance takes time and your settlement date does not wait for them.
Practical completion inspections
A practical completion inspection gives you the broadest look at the home. It picks up structural, waterproofing and finish issues while the builder’s crews are still on the estate and the trades can be sent back quickly. If the builder offers a handover walk-through, treat it as a starting point rather than your full inspection.
Pro tip: Bring a torch, a notepad and a moisture meter if you own one. Lighting reveals wall and ceiling dents that look invisible under the bright LED panels used during construction.
Pre-settlement walk-through
The pre-settlement check confirms that earlier defects were rectified and that nothing new has appeared since. Bring your original defect list, photograph each item again and mark anything still open. Do not settle with items marked open unless you have written confirmation of when they will be completed.
What Inspectors Check on a New Build
A thorough new home inspection follows a sequence, starting with the outside of the home and finishing with the services. The order matters because drainage faults and roof defects often explain interior damage you will otherwise attribute to something else. A sound inspection covers the structure, envelope, wet areas and services in a logical loop.
Wet areas and waterproofing
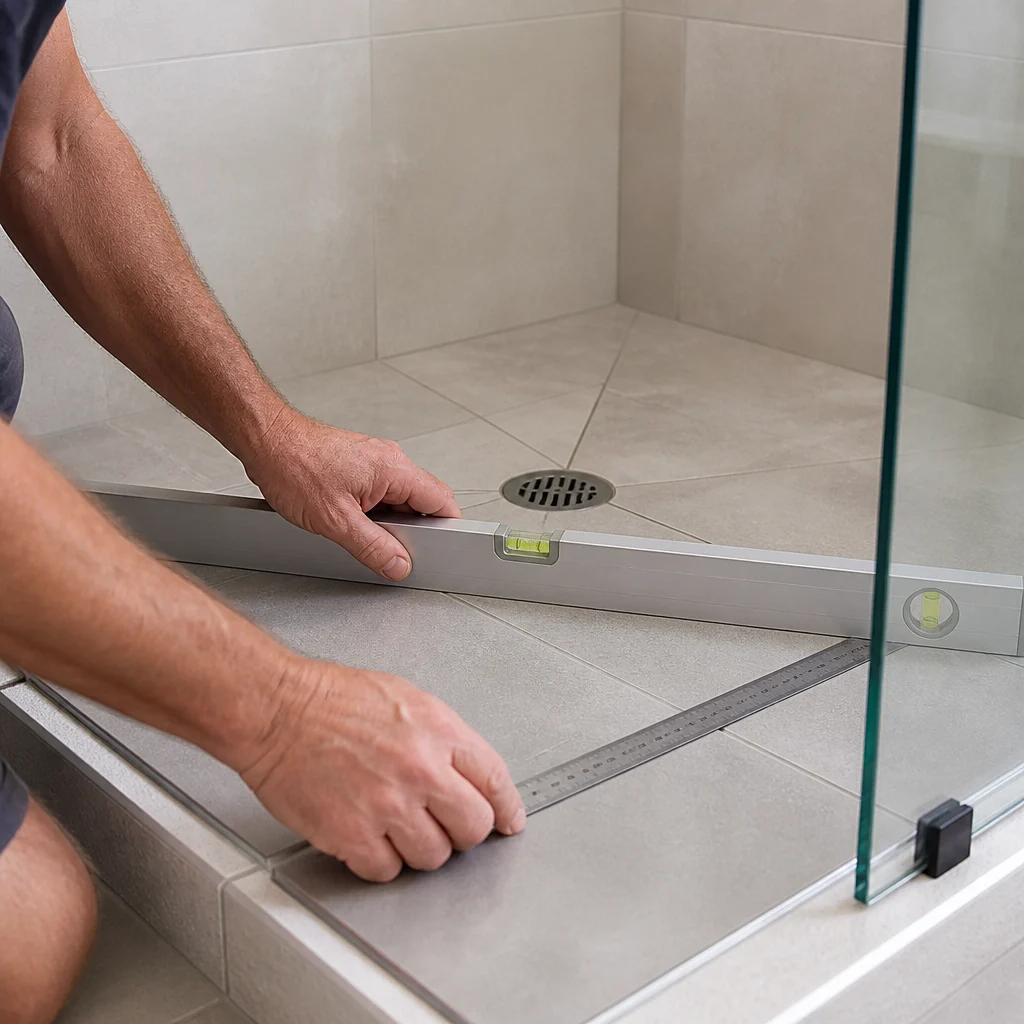
Bathrooms, laundries and ensuites are where new homes most often fail in the first year. Check tile falls toward the waste, look for hollow-sounding tiles that may indicate poor adhesion, and inspect silicone junctions around the bath and shower screen. Run every tap and shower for several minutes, then check the ceiling below for staining.
Roof, gutters and external drainage
Look at roof flashings, ridge capping and the junction where the roof meets walls. Confirm gutters fall toward downpipes and that downpipes discharge away from the slab edge. Ponding water near the footings is a warning sign that needs an answer before you accept the home.
A common mistake is to inspect the roof from the ground and assume it is fine. Binoculars help, but many problems at flashings and penetrations are only visible from a safe vantage point or through a careful look at the ceiling space.
Electrical and fit-off
Check that every power point, light switch and exhaust fan works, and that the switchboard is labelled clearly. Doors and cupboards should open and close without binding, and window locks should engage properly. These small items often reveal how carefully the fit-off was done, and they are easy for a builder to rectify before handover.
Assigning Defects to the Right Trade
A defect report is only useful if someone can act on it. When a list says “cracked tile” without saying which trade laid it, the builder will often send a general handyman who may not have the right materials or skills. Naming the responsible trade, such as a tiler, waterproofer, plasterer or plumber, moves the item to the right crew on the first visit.
Why trade responsibility speeds up repairs
Builders run multiple trades across several lots, and each trade has its own schedule. If the defect is clearly attributed, the site supervisor can book the correct crew without a second round of diagnosis. This is often the difference between a repair in a week and a repair that drags past settlement.
Pro tip: When you attribute a defect to a trade, add a short note on what the trade needs to check, such as “verify waterproofing membrane lap at the shower floor.” Specific instructions reduce the chance the repair is closed without fixing the cause.
Writing defect items builders will act on
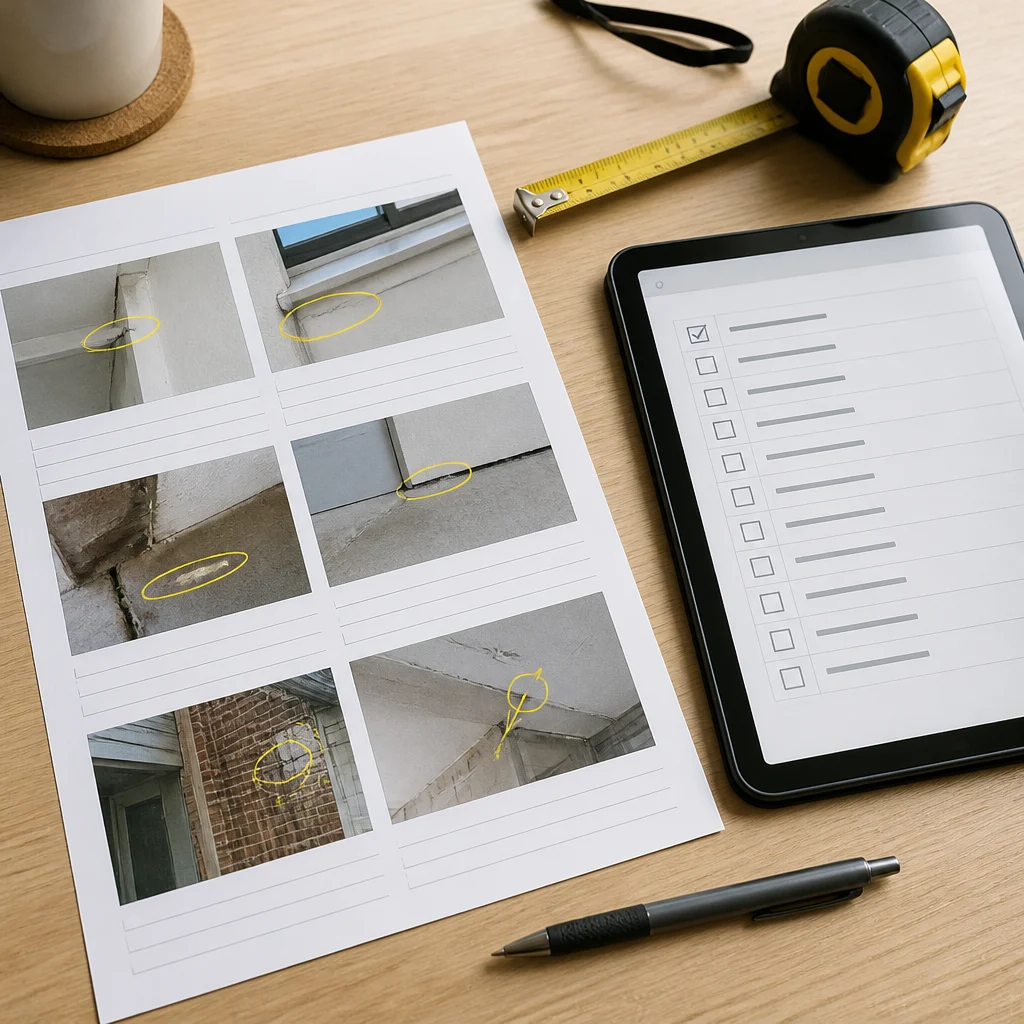
Each item should have four parts: the location, a plain description, the responsible trade and a photo. For example, “Laundry, north-facing wall, paint blistering approximately at skirting height, plasterer to inspect and repaint, photo attached.” This gives the builder enough information to schedule the work without a call back to you.
Comparing Inspection Approaches
Buyers in Springwood and Browns Plains usually choose between three ways of checking a new home. Each has a place, but they differ sharply in how much they catch and how neutral the result is. The table below sets out the trade-offs in plain terms.
| Approach | What it covers | Where it falls short |
|---|---|---|
| Builder’s handover walk-through | The builder’s own checklist of finished items, usually guided by the site supervisor | The builder has a commercial interest in closing the job. Findings are rarely recorded in detail, and photos are often missing. |
| Buyer’s own walk-through with a checklist | Anything you can see and test with a checklist, a torch and a moisture meter | Without training, buyers tend to miss hidden moisture, roof and drainage faults. Reports are informal and hard to use for a formal defect claim. |
| Independent licensed inspection with a photo report | A full, structured inspection with photo evidence, trade attribution and a written report you can send directly to the builder | It costs more than a DIY walk-through and needs booking early. Value depends on the inspector’s experience and the report’s clarity. |
In my experience, the independent inspection gives the best return because the report becomes the builder’s to-do list. The other two approaches can be useful as a supplement, but they rarely produce the paper trail you need if a defect is disputed after settlement.
Photo Evidence and Same-Day Reporting
Photos change how a defect is received. A written note that a wall is “uneven” can be debated, while a photo with a clear reference point and a short description is hard to argue with. For new builds, photos taken during the inspection are also a record of the condition at handover, which matters if problems appear later.
What a useful defect photo looks like
Take one wide photo that shows where the defect sits in the room, then a close photo that shows the defect itself. Include a reference object, such as a door frame or a power point, so the builder can find the spot without guessing. Good photos make a report usable on the day, not just a document to file.
Why same-day reporting matters at settlement
The faster you have a written report, the sooner the builder can act. A same-day report gives you time to raise defects, request re-inspection and negotiate a repair timeline before settlement. Delays of several days can leave you with a shorter window and fewer options if the builder pushes back.
Local Conditions in Springwood and Browns Plains
Local weather and site conditions change which defects are most likely to appear. Late spring in South Brisbane brings warm, humid days and occasional heavy storms, and a new home that is handed over during this period needs a specific set of checks. Some issues will not show until the first wet season, so it pays to look closely now.
Humidity, storms and late spring
Humidity slows drying in bathrooms, laundries and ceiling cavities, so check for condensation on windows and mirrors and for a musty smell in closed rooms. After a storm, inspect the roof space and the walls below any flashings, because water can track along framing before it shows on the paint. Ask the builder to confirm that exhaust fans and ventilation grilles are installed and working.
Storm-driven rain tests windows and doors more than normal rain. Check the weatherseals, sill junctions and door thresholds, and look for water tracking inside the frame. These faults are easy to miss on a dry day and are quick to fix before handover.
Lot grading and estate drainage
New estates in this part of Logan often involve fill and recent ground works, so drainage needs a closer look. Walk the perimeter of the block and check that the ground falls away from the house. Pooling water against the footings or a path that slopes back toward the slab is a fault to raise in writing, not a cosmetic issue to ignore.
Following Up After the Inspection
An inspection only works if the findings are followed up. The most common failure I see is a list that is handed over, filed and forgotten until the first complaint. A simple tracking system, with each defect numbered, assigned and dated, keeps the process moving.
A defect list is only as useful as the next step it triggers. If a finding has no owner, no date and no photo, it will sit on the fridge until settlement.
Tracking repairs to closure
Create a simple spreadsheet with the defect number, location, trade, due date and status. Update it after each re-inspection and keep copies of every photo and email. When a repair is marked complete, check it on site, then record the result rather than relying on a verbal confirmation.
Pro tip: Ask the builder to confirm each repair in writing, with the date and the trade that completed it. A written close-out makes it much easier to escalate a defect that reappears after settlement.
Escalating unresolved defects
If a defect is not resolved before settlement, put your concerns in writing and refer to the specific items in your report. Keep the tone factual and avoid emotional language, because a clear record is more persuasive than a heated call. If the builder is unresponsive, your report and photos become the evidence you need for the next step, which may involve the QBCC.
Frequently Asked Questions
How long before settlement should I book a new home inspection in Springwood?
Book as soon as practical completion is confirmed, ideally within a few days. That leaves time for the report, the builder’s repairs and a re-inspection before your settlement date.
Is a pre-settlement inspection different from a practical completion inspection?
Yes. A practical completion inspection is the broader check when the home is finished, while a pre-settlement inspection confirms that repairs were completed and no new defects have appeared before you settle.
Do I still need an inspection if the builder has its own quality team?
Yes, because the builder’s team has a commercial interest in closing the job. An independent inspection gives you a neutral record and a report you can use if a defect is disputed.
How quickly can I receive a defect report after the inspection?
Same-day reporting is the standard you should expect from a photo-based inspection. The faster the report, the more time you have to raise defects and arrange re-inspection before settlement.
What does a new home inspection cost in Brisbane?
Pricing starts from $550 including GST for a new home inspection. Ask for a quote that clearly lists what is covered, including photos, trade attribution and re-inspection, so you can compare like with like.
Have you bought a new build in Springwood, Browns Plains or nearby suburbs, and what did your handover inspection uncover that you did not expect?