
Apartment paint inspections work best when the project team agrees what is ready to inspect, how finishes will be assessed and how each finding will be located again. A useful QA record distinguishes incomplete painting, patch repairs, paint on adjacent finishes and other visible concerns. It gives the supervisor and painter a specific task at a specific location.
On a high-rise or multi-residential development, that means more than a general instruction to “touch up the paint”. The inspection program needs consistent viewing conditions, clear room references and a record that remains useful when trades return. Here is a practical approach, illustrated by four findings in a GoInspect apartment handover report.
Agree the inspection stage before the walk-through
Confirm which apartments and rooms are ready for review. Identify painting still underway, surfaces awaiting repairs and areas that cannot yet be accessed. A completed-looking room and a room awaiting its final coat need different records.
For a practical completion inspection (PCI), ask the team to identify outstanding work before the visit. Keep that information alongside the inspector’s observations, with its source clear. A contractor’s statement that a room is finished is useful background; the inspection records the condition found on the day.
When commissioning apartment defect inspections, agree the locations, access arrangements and report requirements. If only selected apartments or areas are included, identify them clearly. The resulting findings describe the work inspected, rather than the finish throughout the entire development.
Use appropriate viewing conditions
For Queensland work, section 1.4 of the QBCC Standards and Tolerances Guide generally assesses surface colour, texture and finish from a normal viewing position: 1.5 metres or more away, under diffused light that does not strike along the surface. Different provisions apply to some materials and items.
A close-up photograph can locate a concern; it does not replace assessment under the applicable conditions. Avoid treating a torch held along a painted wall as the universal acceptance test. Where lighting or access prevents a useful assessment, record that limitation and arrange an appropriate return check.
The guide is a reference alongside the applicable contract, standards and product requirements. It was prepared mainly for domestic work and can apply to other construction where relevant; an apartment assessment still needs the requirements appropriate to the actual work.
Four examples: give each condition a clear description
The following excerpts come from one GoInspect apartment report. They illustrate different tasks for the project team, without establishing how often these conditions occur across apartments.
1. Thin or patchy coverage above a door
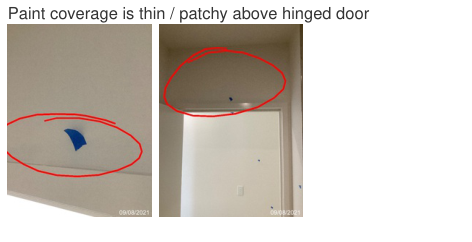
The inspector described the paint coverage above a hinged bathroom door as thin or patchy. The room and door reference make the finding more useful than “poor paint coverage”. The painter can locate the area and review the appropriate treatment against the specified finish.
The report records appearance at that location. It does not establish the number of coats applied or prove which preparation step caused the condition.
2. Patch repairs above a cavity sliding door
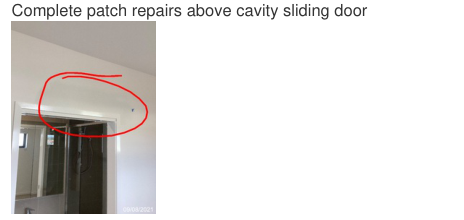
A bedroom entry called for patch repairs above a cavity sliding door to be completed. Keep the patch location and the required review together so that the supervisor can coordinate the response. If preparation and painting involve different people, confirm that sequence before marking the task complete.
3. Paint on a sliding-door seal
Another entry called for paint to be removed from a sliding-door seal. This concerns paint on an adjacent finished component, rather than coverage of the painted wall. Identify the affected seal and ask the relevant trade to choose a suitable treatment for that material.
4. An unfinished ceiling patch
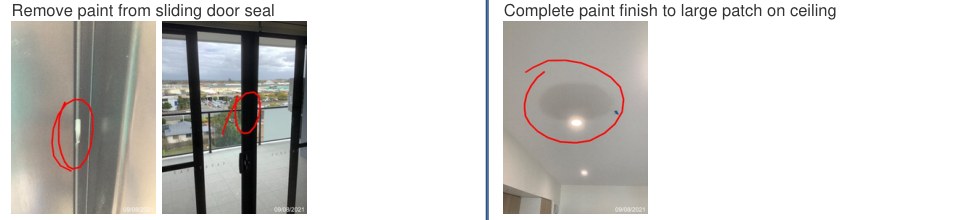
The ceiling entry asked for the paint finish to a large patch to be completed. Its description and photograph provide a reference for the return visit. Review the completed area in context, including the surrounding finish, rather than checking only whether someone has applied paint to the marked spot.
Build a practical apartment paint checklist
Use the agreed scope to guide a consistent room-by-room review. Relevant questions include:
- Is the painting complete, including the identified patch repairs?
- Are there visible coverage or finish concerns under the applicable viewing conditions?
- Do painted edges and junctions need attention?
- Is paint present on adjoining seals, frames, fittings or other finished surfaces?
- Are visible damaged areas or fixing locations awaiting repair?
- Can each reported location be found again without relying on someone’s memory?
These checks help organise the visit. They are not a substitute for assessing the particular surface or confirming the specified coating system. Record what needs clarification where the appropriate response is uncertain.
Keep tape marks connected to the report
If the site team uses removable tape to mark finish concerns, agree who will place and remove it, using a method suitable for the surface. Tape can help a returning trade locate an area, but it can move or disappear. Preserve a room reference, short description and photograph in the report.
For a room with several concerns, make the instruction sufficiently clear to define the work needing review. Avoid assuming that a photograph of one mark represents every wall, or that an unmarked room has been checked.
Use InspectaMate to keep the locations together
In GoInspect’s InspectaMate reporting workflow, findings stay connected to their locations, descriptions, photographs and relevant trades. Dwelling or location reports help the team return to the right apartment; a painter’s trade report brings relevant items together for planning.
Agree the report types needed for the project. A trade allocation helps route the task, while the supervisor confirms who should carry out the work. Retain the original item when recording a response or arranging a re-inspection, so that the later check has a clear reference.
Takeaway: agree readiness and viewing conditions, describe each condition clearly and keep the location available for follow-up. For multi-residential new build inspections, discuss the program and reporting requirements through our builder and developer QA inspection service or request a project quote.