
Hybrid flooring is a floating floor and needs an expansion gap around the perimeter. Filling that gap with silicone restrains the flooring and prevents the movement it was installed to allow. A neat bead of sealant does not replace the required expansion clearance.
The two standard perimeter finishes are straightforward: install the flooring first and fit new skirtings above it, or leave the required gap beside existing skirtings and cover it with scotia. In both cases, the flooring must remain free to move.
What is a hybrid flooring expansion gap?
An expansion gap is the clearance allowed between the flooring and fixed surroundings, such as a wall or doorway. It gives a floating floor room to move. It is different from an open joint between two planks. Skirting or a trim may cover the perimeter gap, but the finished detail must still allow the specified movement.
Start with the product name and installation instructions. Do not apply a gap dimension from a different brand, or assume that every floor sold as “hybrid” has identical requirements.
A real handover finding: the flooring perimeter had been sealed
In one GoInspect apartment handover report, we identified the siliconed hybrid-flooring perimeter as a defect restricting expansion. The photographs below show the recorded junctions: beside skirting, at a vertical panel and near a doorway.
The report identifies the installation problem and its locations so the builder can arrange appropriate rectification. The objective is to restore the required movement, rather than simply improve the appearance of the bead.
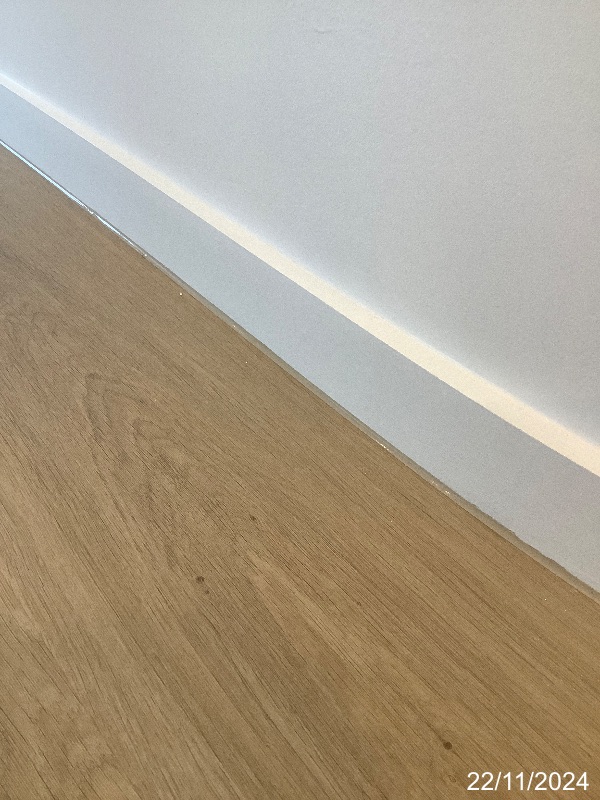
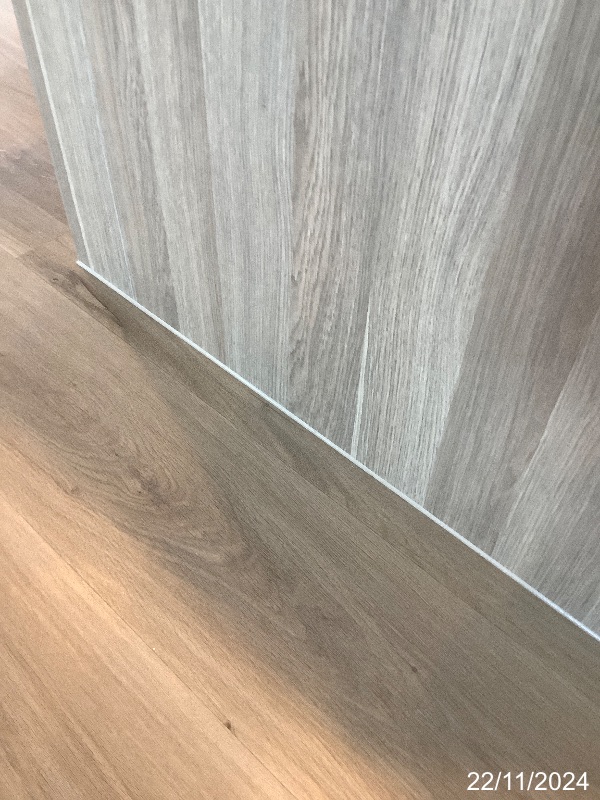
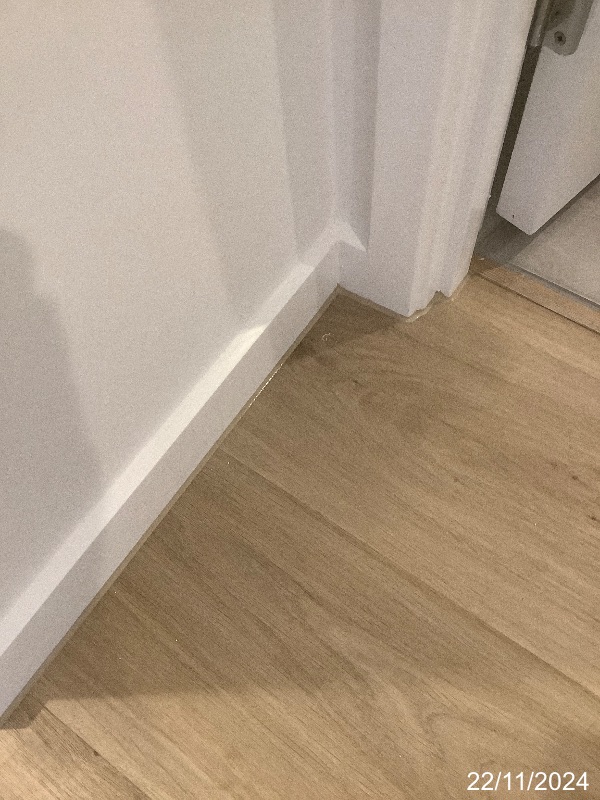
The photographs support the recorded defect and show the builder where to attend. The exact gap dimension and rectification detail should be checked against the installed product’s instructions. We have not identified that product for this article or claimed that the defect has since been rectified.
Why blocking the expansion gap is defective
The expansion allowance is part of the installation requirement. Filling it with silicone, or bonding the flooring to a fixed edge so that the required movement is restricted, defeats that allowance. Calling the sealant “flexible” does not establish that the completed detail meets the flooring instructions.
Does the floor need to be lifting before it is a defect?
No. Where the installation blocks movement that the manufacturer requires, it can be reported as defective before visible lifting or joint damage occurs. The relevant check is whether the installed detail provides the required movement. A floor looking flat on inspection day does not establish that this requirement has been met.
A separate site example: cracked flooring with no expansion allowance
On another GoInspect job, the hybrid flooring had a cracked plank edge and our inspector confirmed that no expansion allowance had been provided. This is a real site example of damaged flooring found alongside an installation that did not allow the floating floor to move. The lack of expansion allowance was a site finding; it is not something that should be inferred from a photograph of a cracked board alone.
How to finish hybrid flooring properly: skirtings or scotia
The finishing trim covers the expansion gap; it must not stop the floor moving. These are the two standard details for a dry-area floating-floor perimeter.
Method 1: install the flooring first, then fit new skirtings
- Lay the hybrid flooring with the clearance required by its installation instructions between the plank edge and the wall or other fixed surface.
- Fit the skirting above the flooring so it covers the perimeter gap. Fix the skirting to the wall, keeping the floating floor free to move beneath it.
- Do not run silicone between the skirting and the flooring or use fixings through the skirting to pin the floor down.
Method 2: keep existing skirtings and cover the gap with scotia
- Where the existing skirting stays in place, finish the plank edge with the specified expansion gap beside the skirting. Do not butt the flooring tightly against it.
- Cover that gap with a suitable scotia trim. Fix the scotia to the existing skirting, not to the hybrid planks.
- Keep the flooring free to move beneath the trim. Do not fill the perimeter gap with silicone or bond the scotia to the flooring.
The result is the same with either method: a covered perimeter gap with no silicone or fixings restraining the floor.
Use the clearance and finishing requirements for the actual product. Some manufacturers specify separate approved wet-area or local sealing details; those systems must preserve movement and follow all of that product’s conditions.
What the manufacturers’ installation instructions say
These official Australian installation guides provide clear examples of the expansion and finishing requirements. A required movement gap must remain effective after the flooring is finished.
| Manufacturer / range | Expansion and perimeter-finishing instructions |
|---|---|
| Godfrey Hirst hybrid floors | The August 2026 Australian guide requires a minimum 10 millimetres at fixed vertical surfaces. General finishing instruction 9 says: Silicone or caulking compound should not be used.It specifies skirting, scotia or end caps to cover the gap, with fixings to the wall rather than the flooring. Listed wet-area products have separate conditions on page 2. |
| Preference Floors hybrid ranges | The guide covering Aspire, Easi-Plank, Hydroplank, Lifestyle and Iconic specifies 8–10 millimetres for general perimeter installations within its stated raft sizes. Its caulking section says: Do not fill any expansion provisions with caulking compoundsbecause movement is restricted. It separately describes limited local finishing details; these do not permit general filling of the floor’s expansion gaps. |
| Quick-Step Bloom Hybrid Vinyl | The May 2025 guide recommends a 10-millimetre perimeter gap and gives further location-specific requirements. Section 3A says: Do not fill the expansion gaps with siliconeor anything preventing free movement. Section 3B provides a specific compressible foam-strip and flexible HydroKit sealing system for its designated finishing detail. |
| Karndean rigid core with 5G system | The guide linked from Karndean’s Australian installation page requires at least 5 millimetres around the perimeter and fixed objects, increasing to 8 millimetres for areas over 100 square metres, with further requirements for high-temperature areas. It states: Sealant should not be used for the general filling of expansion gaps.Potential wet-area sealing is subject to specified materials and separation requirements. |
These are product-specific instructions, not one universal gap dimension. Where a guide provides a particular wet-area or local finishing detail, all of its conditions must be followed. An approved detail for one product or location does not justify siliconing the entire perimeter of another floor.
The practical conclusion: Where silicone blocks the required expansion allowance or restrains the floating floor contrary to its installation instructions, record it as an installation defect and require a suitable rectification method. A neat finish or a claim that silicone is flexible does not resolve that defect.
What to check at the flooring perimeter
- Expansion clearance: the gap must meet the actual product instructions. Skirting or scotia may conceal it; an apparently neat edge does not prove the correct clearance exists behind the trim.
- Trim fixing: skirting attaches to the wall and scotia attaches to the existing skirting. Neither should be fixed to the floating planks or clamp their required movement.
- Perimeter silicone: a continuous bead restraining the floor is an installation defect. Rectification needs to restore the specified movement, rather than cover the same junction with more sealant.
- Other fixed edges: doorways, fixed panels and cabinetry also need the product’s appropriate movement detail. Do not assume the wall-edge detail covers every junction.
The floor does not have to be lifting before restricted expansion is defective. Record the affected locations and the installation issue, with photographs that show the junction clearly.
Does perimeter silicone automatically void the warranty?
Report the installation defect clearly: the required movement has been restricted and needs to be restored. Any effect on warranty coverage must be checked against the actual product’s warranty and installation conditions, rather than assuming that every warranty is automatically void.
What an inspection report adds
A useful finding connects a location, a photograph and a clear description. Together, these help the builder understand the concern and identify what needs further checking. Keeping the original finding and subsequent response together also makes a later review easier.
GoInspect uses InspectaMate to organise photographic inspection findings. Our InspectaMate reporting workflow article shows how those records help communicate what needs attention.
A finished-home inspection still has access and visibility limits. A visible junction does not reveal the clearance behind every skirting board, and an inspection cannot confirm all concealed work. The agreed scope and any limitations should be clear in the report.
Arrange your handover inspection
If your new home is approaching handover, read what our handover inspection service covers and coordinate suitable access with your builder. Share any flooring concerns and product documents when arranging the visit.
You can get your inspection price online and provide the property details for your booking.